Saturday, July 31, 2010

Definitely Decorative from convention

Here are some more pictures from convention.  This time the pictures feature the Definitely Decorative line of items you can purchase on my website:
Here are some beautifully stenciled walls and a great idea for holding photos! 
I loved this notebook and a darling idea for dressing up a lamp with lots of ribbon - how easy is that?
Finally, a froofy little thing at the top made of paper and ribbons - it was just too cute and simple to make!  Very shabby chic!

Friday, July 30, 2010

Interactive mini journal and Nursery Baby Suite

Here is a little mini journal that I made in the car on the way to and from Utah.  Yes, I scrapbook in the car...but only when I'm stuck for 5-6 hours at a time or more!  It really passes the time nicely!!!  And it is much easier to sit and sand paper for an hour or more when you know you can't go anywhere else!  (Just don't wear a black shirt when you do this - ask me how I know!!!  Hee hee!)
Anyway, this journal front was inspired by the interactive cards class that I took online from Andrea Walford and Sophia Landry.  I just took their version and changed it up a bit and after 3-4 tries, I came up with an interesting journal cover!  I used the briefcase chipboard album, Sentimental Journey stamp set and In a Word stamp set to make it. 
Here are a few more pics from convention....these focus on the Sweet Baby Nursery Suite.  Here is a darling little diaper cake - a perfect little gift to give a new mommy!
Here are a few little cards as well as a gorgeous scrapbook page using the diecut paper.
And, of course, we can't leave all those little boys out!  Here is a sweet baby boy snoozing away on beautiful paper! 
Stay tuned for more pictures from convention.  I'm working on a digital album of my trip to Utah and all the National Parks right now.  I'll see if I can convert it to something that allows me to share the album on my blog when I'm finished.  If you do My Digital Studio and you have any tips, you can leave a comment if you know how to share an entire album!

Friday, July 23, 2010

Quick post from convention

Here is my other swap card - I made 25 of each card and swapped them all today.  This had a more masculine look with the Night of Navy/Bashful Blue/Pumpkin Pie color combo.  I stamped the compass from Sentimental Journey on Kraft paper and put a rhinestone or pearl in the center.  I stamped various layers of circles and the scallop circle punch for that.  I used a small strip of Travel Journal DSP on the left side.  Next I stamped remember from the In a Word stamp set with Night of Navy onto Bashful Blue cardstock and ran it through the Big Shot with the scallop rectangle clearlit.  You can see your image as you run it through the Big Shot; it makes it really easy to center the stamped image on the rectangle!  Finally, I stamped the remember word and the Eiffel Tower image from Artistic Etchings in Whisper White onto Night of Navy cardstock and heat embossed both images using Irridescent Ice Embossing Powder.  I was quite pleased with the result!
I can't resist throwing in a few other pics before I finish.  I don't have much time to post or be on the computer at all for that matter....but here is a pic of my family with Shelli and Sterling Gardner - we had a Flower Power party Wednesday night to kick off the Stampin' Up convention!  It was loads of fun!  As usual, Shelli was darling and sweet and sincere - it is so awesome to be able to say hello to the founding owner of the company you work for!
Finally, just a few pics of the darling birthday ideas I saw!  Cute ways to doll up the kits you can get in the catalogue - you can keep it simple or you can go all out!

Thursday, July 22, 2010

Sweet and sour DSP card

Here's a quick card I made in the hotel the other day.  I used the Sweet and Sour DSP to make this with Pumpkin Pie and Whisper White as well.
I punched a cute little owl and masked some balloons for him to hold on to.  Then I made a slide and masked a sign and more ballons for a cute little birthday.  Just a little more inspiration from Andrea Walford and Sophia Landry.
Now I'm off to the Stampin' Up convention....talk about inspiration!!!  Maybe I can post some pics later!

Friday, July 16, 2010

New color update on My Digital Studio!

Here's another quickie card I made on MDS while waiting on the daughter to go to sleep.  (Do your kids not go to sleep as well in the summer or is it just us?!?!?)
Anyway, if you haven't been on your MDS in a while, you need to get a free update of all the new colors!  I used Pear Pizzazz, Blushing Bride and Early Espresso for this card.
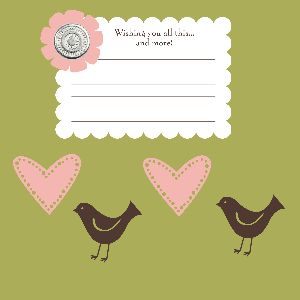
Here's the inside of the card - I used the Best Wishes and More stamp set/brush to make this card and added a little journaling block from the Write Stuff digi kit to make a spot for writing a personal note.  It was really that easy!  You should give it a try!

Thursday, July 15, 2010

Color coach to the rescue!

Here is a fabulous card that I made using the color coach to decide the color combo.  I admit it is not a color combo I would have created - Rich Razzleberry, Old Olive and Tangerine Tango.  I actually stamped the medallion image 3 times - 1 in each color.   Next, I cut out each part and glued it together.   I added some faux stitching around the edge with my Tangerine Tango marker and finished it off with an adhesive pearl and satin ribbon - elegant for any occasion!

Wednesday, July 14, 2010

Saving the Earth....one papercraft at a time!

One of my goals lately has been to make sure that I am using the scraps leftover from clubs or other projects that have things leftover.  I have decided that since everything is already cut and ready for a previously designed project, I might as well use it!
So you may remember a similar project just the other day to the card above.  I just made this card horizontal and used the Elements of Style and Birthday Greetings stamp sets to make this project.  You'll also notice a little bit of brown glitter in the center of flowers.
For this project I used the backs of the 2010 calendar that we made at the beginning of the year.  I stamped a woodgrain stamp on the background piece and just made a small square for my image.  The image is super easy - just a little sponging in Soft Sky, Old Olive and Soft Suede and a quick tree and sentiment from the Trendy Trees stamp set and now the calendar page did not go in the trash when I was done! 
Just saving the Earth....one papercraft at a time!  Hee hee!