Friday, December 31, 2010

Sassy Lil Sketches 12/28

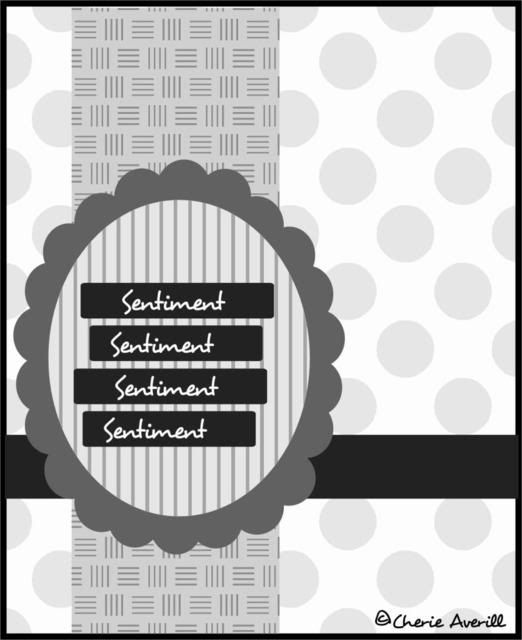
I loved this sketch by Cherie over at Sassy 'Lil Sketches.  It immediately sparked some inspiration for me, so this page came together in a jiffy!
 I punched several 1 1/4" circles for the circle around the pictures and inked them with Early Espresso.  The hardest part was figuring out which pieces to adhere first without losing my circle shape!  I added a few little embellishments from K & Company.  I also used a little 3-dimensional circle from Makin Memories that said Just Us Kids for the title.  I know you can't see it, but I actually used the backing from the K & Company package for my picture base on the top right!  I finished it all up with a few pieces of ribbon - chocolate chip satin polka dot ribbon and some soft sky ric rac.  The paper is from CTMH.
Since I was on a roll, I decided to finish up the rest of the pictures with a quick and easy little layout that matched.  I also made a card out of scraps, although I just realized that I forgot to take a pic of it! 

Thursday, December 30, 2010

A great two page sketch and layout!

 Liz Qualman made me a happy little scrapper yesterday!  She had this gorgeous two page sketch that was just perfect for my style!  I love the streamlined look of this layout - and what a bonus to find a two page layout!  So, here is the layout that I made using her sketch. 
I found some Easter paper still hanging around in the patterned paper stash, so I thought this would be a great way to finish up last year's Easter photos.  (Yes, I realize that I scrap completely out of season!)  Anyway, the papers are SU.  The flowers are actually part of the patterned paper that I cut out, sponged and curled the edges to give them a more realistic look.  I also punched out a 3/4" circle and embossed it with tiny polka dots to give it another dimensional look.   I added that darling little crocheted duck from Making Memories vintage line and a row of purple flowers by Jolee's Boutique across the bottom. 
Here is a closeup of the corner so you can see the flowers and sweet little duck!  Aren't they adorable?!?!?

Ink:  Early Espresso
Paper: Orchid Opulance, So Saffron, Spring Designs DSP
Accessories:  3/4" punch, flowers (Jolee's), duck (Making Memories), polka dot embossing folder for Sizzix Big Shot

Wednesday, December 29, 2010

Trip with the youth


Well, blogger is not letting me add any more pics.....it annoys me quite a bit sometimes.  Anyway....
I'm on a trip with our youth group, so it's nice to have My Digital Studio on my laptop so I can actually make a scrapbook page while we're hanging out! 
I used a sketch from Sketchabilities (the one blogger won't let me load!) for the top layout.  Then, I just took the same layout and changed up some of the elements to create the second page for the layout. 
I used the Night and Day specialty paper and a vintage overlay for the base of the layout.  I used the Extreme Elements stamp brush for the accents. 
Now....here's to hoping that I get more than 5 hours of sleep tonight!  LOL!

Monday, December 27, 2010

Liz Qualman sketch

Here is a layout I made using Liz Qualman's sketch at the Imaginisce blog.  I love their products (even though I don't have any...it's okay to drool, though, isn't it?!?!)  Anyway, this sketch was a great challenge to make a banner out of something other than flags.  While I thought about using Easter eggs, I thought it would be a little cheesy, so I decided to use flowers. 
For my color scheme, I went with a less pink and green feel and found some inspiration in the Curtain Call Color Challenge #62.
The paper and ribbon are all SU - Greenhouse Gala DSP is featured.  I also used several flowers and other embellishments from Making Memories.  The little blue rhinestones are Martha Stewart.

Sunday, December 26, 2010

Scrapfit WO#34 and 12/21 Sassy 'Lil Sketch

Okay, so I have been just about to explode since I haven't gotten to play any this week.  Finally tonight I got a page done.  I've literally had the paper and pictures for this layout ready to create for over a month.  They have just sat on my desk and sat and sat....I have even gotten everything out and arranged pics, I just couldn't get any inspiration.
Enter the 12/21 sketch over at Sassy 'Lil Sketches and the Scrapfit Workout #34.  You see the sketch above.  Workout #34 is to scrap a holiday tradition or a holiday surprise.  Granted....I'm pretty sure they were thinking Christmas traditions!  I really needed to finish this Easter layout, though.  Hey, it's still a holiday! 
 So, here's what I came up with.  I broke out of my little 2-page layout box and went with a completely different page for this layout than the other pics that will be on the other side of my scrapbook when I drop the page in!  I did at least stay with the same color scheme. 
I used Wild Wasabi, Melon Mambo and Whisper White paper for this layout.  I dry brushed the edges with shimmery white acrylic paint that had Melon Mambo re-inker mixed in it.  The journaling block and the black scallop edge at the top are by Me & My Big Ideas.  The pink swatch across the top is just raffia that I had in my stash.  The rhinestones and material title that says Beautiful are by Making Memories - I swabbed Melon Mambo ink across the material so it would match the pink a little better.  At the bottom are a few ribbons from the stash and some darling new Melon Mambo pom pom ribbon that is coming out in January!  I love it!
And just for good measure....here is a funny pic from earlier today.  I told you earlier that we got snow here and we like to play in it even if it is only 3-5 inches!  Grammy and Poppy got Halleigh a sled for Christmas, so we all took turns riding it down our big hill, or the "Sled Park" as Halleigh called it (a.k.a. our back yard!).  Here is a picture of my dad going down the hill with Halleigh hidden behind him - they cackled all the way down!  Note-my dad is 64, so this is probably the most fun he's had in a while!  I think he could have stayed outside playing for even longer!  Hee hee!

The perfect gift card holder

I got the basic idea for this gift card holder from Andrea Walford and Sophia Landry's 12 weeks of Christmas emails.  I decided to create these at our last club meeting in December.  They were a big hit and they were perfect for the few gift cards we gave out.  I didn't have any waffle paper to use, so I decided to repurpose some tulle I had saved from a gift from last year and use that to pretty up the top of the gift card holder.  This was so cute and so easy!  Now....on to non-Christmas projects.  I am soooooooo ready to scrap, it isn't funny!

Saturday, December 25, 2010

No dreamin'...it IS a white Christmas!

 Words just can't express the joy on my daughter's face when she awoke at 5:00 a.m. this morning to see if Santa had arrived yet.  (Well, truthfully, she awoke at 2:00 to see if Santa had come, but we just couldn't drag ourselves out of bed for pics at 2 a.m.!).  Honestly, though, when she saw the snow, she said, "Mommy, it really IS Christmas!  Look, Santa brought snow!"  This is our driveway before we drove down the hill to leave for our Christmas celebrations.  How can you not just sing that old familiar song on Christmas morning?!  For those of you who live up north (of Kentucky), it has been 11 years since our last white Christmas - I think my husband and I were first married the last time we had snow pics!  So three inches on Christmas morning is huge for us!
 So....enough babbling....I promised to share a quick and easy project I did wiith some of the girls in our youth group last weekend.  (That darn Christmas shopping and wrapping kept getting in the way!!  LOL)
The girls are just starting to scrapbook, so I wanted to keep it really simple, but still cute and adorable. 
    I made a paper bag album (after all, I didn't charge them.....they begged me to start teaching them....how could I say no to those darlings?!?!)  For my sample, I used the candy cane lane paper and kept everything super simple.  On the cover I used a few diecuts to create the shapes.  I think they are the Northern Flurry snowflakes sizzlits die and the Christmas cheer die, although I'm away from home, so I can't check.  I added some chunky red essentials glitter to the center of the snowflakes to make sure it was glitteriffic!
 Here is a sample inside layout.  I didn't photo all of them because they were so easy.  I just took a front and back of the DSP and either used a scrap strip, a scalloped edge, or a torn edge to create a simple edge for each page.  I also watercolored matching items for an embellishment on the page and the pullout tab for the pocket.  Each image was raised with a pop dot to add emphasis.
 How can you not just adore this paper?  I love, love, love this paper because it makes me want to lick it!  I love candy canes, so candy cane themed paper is totally up my alley!  Here's another super simple layout.  I made sure to put the stampin' dimensionals under the bottom part of the candy cane image so I could slide some pictures underneath. 
 Here are a few more sizzlits dies to embellish the edges of the center pages.  I added some accents to the real red letters and the little bird with my white uniball gel pen for good measure.
Here is one more layout.  It is almost identical to the candy cane image page...I just added a line of trim at the top to make it look like the ornaments really were hanging from a little garland.  I just love this trim!  I tried to buy some that was similar at the M store, but it just wasn't the same quality.....I hope they bring this trim and the gold/silver cord back again next year! 

For now, Merry Christmas to all and to all a good night!

Sunday, December 19, 2010

Use scraps for tags

The Sassy 'Lil Sketches forum had a tag and card making weekend the last 3 days, so tonight was the first moment I really had to do any scrapping for fun - I had club today and did a scrapbook class for the girls in the youth group yesterday, plus all of our other Christmas fun activities....it was a busy weekend!  Anyway, I missed the 3 o-clock deadline, but I got some cute tags made and some scraps off the table!
 All of the scraps were leftover from a little paper bag album I made as an example for the girls scrapbook class.   They seemed to enjoy getting to make a little paper bag scrapbook album!  I will show you my paper bag album tomorrow!
 I thought this tag was really cute - will you believe it is almost entirely from strips of paper that were 3/4" wide?  I almost always just go on and throw strips that thin away, but they really made a cute tag!
Here's the last one.  I put a little jewelry tag punch above the red strip to give a spot for the person's name for whom the gift will be given.  Now...to just finish buying presents and get them wrapped!  Eek!

Friday, December 17, 2010

Christmas card picture .... take 2!

 Okay....so here's a little tip from a blonde moment I had earlier.  I had this brainy idea to create a postcard with our picture in it to put inside of our Christmas cards.  Well....you know, it didn't exactly occur to me that if your postcard size in MDS is 4 1/2" X 9" it might just pixelate and look awful when it prints!  Thankfully Walgreens was very gracious and gave us another try.....
So...here's take 2.  I used a sketch I found on the Sassy Lil' Sketches forum - they are having a fun sketch contest this weekend.  So here is the new card that printed correctly.  If you are printing out a 4X6 or 4 X 5.3 picture, the regular A2 card size will print out just like a regular picture fine and not pixelate. 

Almost done with Christmas cards?!??! I hope!

I have about 60 cards made now....except I just realized that our Christmas card list grew by leaps and bounds since my husband is now a youth minister!  Eek!  It's great....until I realize that I may have to do 20-40 more cards!  Ack!
 Here is a quick and easy card I made based on another card by Ilina Crouse.  I used some retired Glorious Green paper for the base.  I simply stamped the sentiment and punched a snowflake.  To finish it off, I added some tiny rhinestones I got a long time ago and it was done as quickly as that! 

My daughter helped hold the punch and counted to make sure all the rhinestones were on the tips of the snowflakes!  She also inked up the stamp for the sentiment.  I can't take ALL the credit for this card!  Hee hee! 
Here's one last card.  I used some old Sage Shadow paper for this one.  I used the new scallop square die cut and put a little base of Candy Cane Lane paper as a base.  I added a quick ornament with a matching green pearl from the dollar store and a rub-on for the sentiment.  The color is nicer in person.....

Thursday, December 16, 2010

Gingerbread house and CAS cards

 Here's a quick and easy little Christmas card.  All on one sheet of paper.  I just stamped the snowman and colored him in with black, white, and red!  That's it!
 Here's my daughter trying to bite into the gingerbread house already!  It wasn't even decorated yet!  She had a big time....of course, she ate more candy then she used to decorate it, but she did a fantastic job creating her house!  Super cute!
Don't let daddy fool you...it was mommy who helped make this!  :)
Okay, I've been trying this food setting on my camera....it has a white setting on it, so I thought from the preview on the camera that it was capturing the color well, but since this looks blue rather than Vanilla, I'm thinking....not so much! 
Anyway, the colors here are very Vanilla, Old Olive, and Bravo Burgundy.  It's actually much prettier than the picture shows! 

Wednesday, December 15, 2010

MDS Christmas card and mini album

Here's a little Christmas card I made using a picture of us hiking at Mammoth Cave this spring - we need a little warmth around here since it's only 7 degrees outside! 
Here is a little mini album I made for Halleigh's fourth birthday.  Golly, she is growing up quickly - but she sure is a doll.  We're only a little partial, you know!  :)

Sassy Lil Card sketch

Here's a little card I made using the sketch from the 14th over at Sassy lil Sketches.  I had a few sheets of Mellow Moss paper left, so I thought I would make a muted red/green color combo for a Christmas card.  I found those poinsettias by Making Memories at Tuesday Morning, so I thought they were perfect for a Christmas card!  So rich in color and great texture. 
Stamps:  Snow Swirled
Ink:  Always Artichoke, Cherry Cobbler, Mellow Moss, VersaMark
Paper:  Cherry Cobbler, Mellow Moss, Very Vanilla
Accessories:  Always Artichoke ribbon, Tasteful Trims die cut, brad, Flower/leaf (Making Memories)

Tuesday, December 14, 2010

Another baroque swirl card

I saw a trio of my markers together the other day and decided they might look good together, so I thought I'd make a card with the Marina Mist, Cherry Cobbler and Wild Wasabi combo. 
I don't know why I love this swirly stamp from the Baroque Motif stamp set so much, but I really just adore it!  I had to try another card with it.  I punch an ornament through the base of the card and stamped another for the inside of the card.  This time I used the berry stamp from the Make Merry stamp set that retired last year and added little rhinestones to the center (you can't really see them, though).

For now, I am patiently awaiting the arrival of some new stuff.....our driveway elicited an emergency situation reply when I checked the status of my package to see why it wasn't here yet!  5 inches of snow in a wooded area will do that, I guess.....maybe it won't be so bad they can't deliver it today!  Pretty please?!?!?

Stamps:  Baroque Motif, Make Merry?, tags 'Til Christmas, Snow Swirled
Ink:  Wild Wasabi, Cherry Cobbler, Marina Mist
Paper:  Marina mist, Very Vanilla
Accessories:  Wild Wasabi ribbon, red hemp twine, rhinestones, ornament punch, sponge dauber

Sunday, December 12, 2010

Club postponed until next week

Okay, ladies of Somerset....do not fret because you missed our club today!  I know there are a few inches of snow on the ground and I live where the sun doesn't shine.....we will continue our club fun next week - Sunday, December 19 at 3:00!
And look at what precious goodies we're going to make!  Is this not adorable?  It's a cupcake holder all dolled up to use as a gift holder. 
And inside the cupcake is not food, but a lovely handmade glass
 ornament!  It took about 5 minutes to make this ornament, so in my opinion, this makes it even more wonderful! 
If you want to make one of these babies for yourself, come on over next Sunday at 3:00!  Come have lots of fun with the ladies of Somerset! 
Ink:  Ruby Red
Paper:  DSP from last year, Real Red
Accessories:  Glitter, rhinestones, decor elements, very vanilla taffeta ribbon, Fancy Favor die cut, striped Old Olive grosgrain ribbon, Real Red polka dot ribbon, needle and thread, Old Olive button, 2 1/2" circle punch, hot glue gun

Thursday, December 9, 2010

Sassy Lil Sketch and Crop Suey challenge

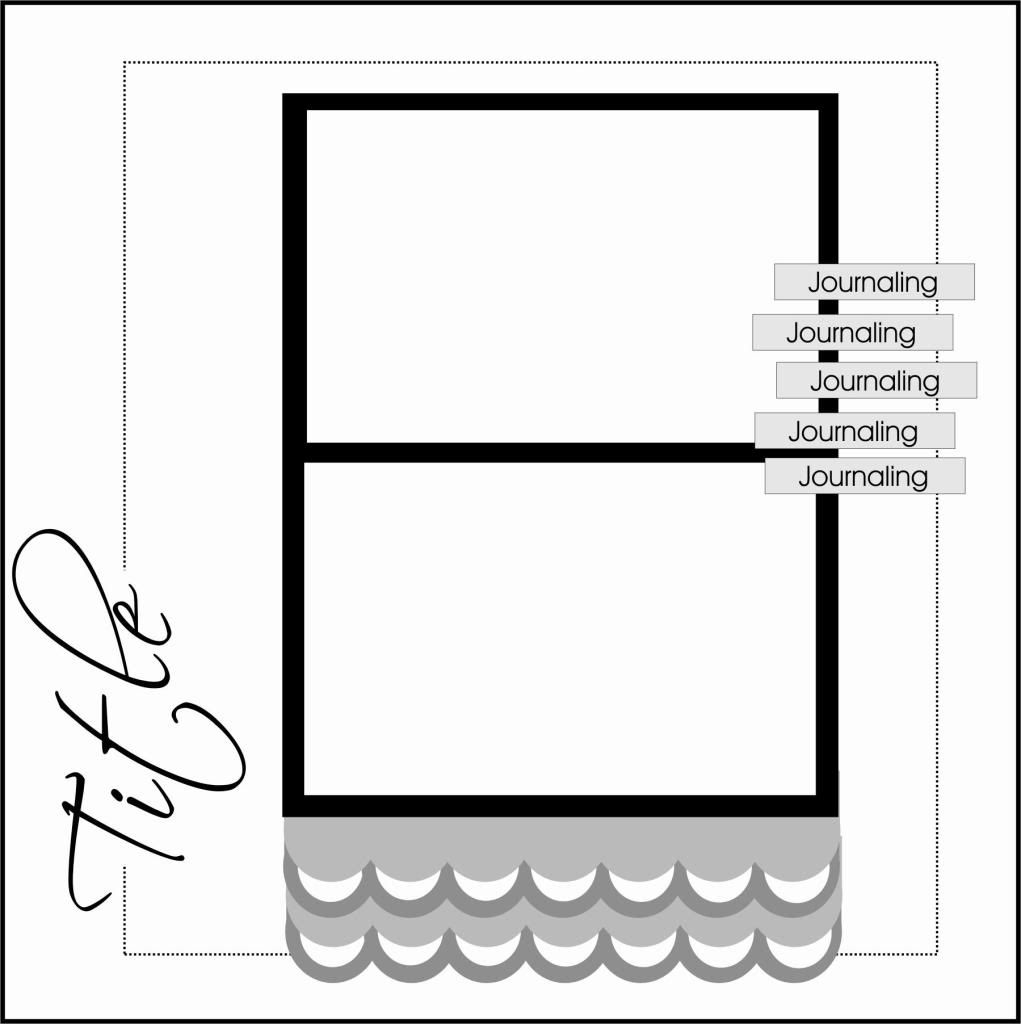
I finally got a scrap page done last  night!  I love and hate this time of year for this reason....I love the festivities, I love making Christmas cards and doing fun stuff....but I really miss my scrap time.  It was nice to just make a layout and not have to worry about anything else.  I experimented with the scallops below the picture.  I have always liked the large scallops made from rows of half hidden circles, so I punch and layered away to make this accent here.  I wasn't sure if I would like it, but I think overall I am pleased with the effect.  It's a different look! 
Crop Suey had a challenge to base a layout on family, so this worked well for the title family.  This is my family and also a picture of my in-laws with my daughter at Easter.  It's not really an Easter color scheme, but I just loved that polka dot dress our daughter wore....it inspired the color scheme, the black rhinestone edging and even the circle scallop edging. 

Sunday, December 5, 2010

Thank you fairy much!

Finally.....I got these thank you cards made!  It has been such a busy month!  I have had 3 Christmas card stamp-a-stack classes in the last 3 weeks.   Let's just say that the ladies have made close to 200 Christmas cards in the last 3 classes!  Yeah....that's why these haven't gotten made!  Crazy, but fun!  Anyway, I got these finished while watching Amazing Race tonight (go girl teams!!!) 
This is all pretty much retired SU stuff or stuff that has been in the stash for a while.  I used a Moonlight Shimmer Pearl color for the fairy dust and Thank You, then I sprinkled and heat embossed with Irridescent Ice Embossing Powder.  It looks like real fairy dust!  :)  On the inside of the card it will say, "Thank you fairy much!" 
Hopefully this week I can get some scrapping done....even one page would make me happy!!!! 

Sunday, November 28, 2010

Clean and simple Christmas greetings

I saw a similar card to this on Ilina Crouse's blog recently.  So, I thought I'd take a try at a clean and simple card with what I had on hand.  I used the ornaments from the Cute Christmas stamp set and colored them with watercolor pencils and blender pens.  I added just a touch of Smooch to the center lines to add a little bit of shimmer.  Next I added a greeting and little red ribbon bow.  That's it!  you can't get much simpler than that!  Christmas will be here soon!

Stamps:  Cute Christmas, Many Merry Messages
Ink:  Real Red, StazOn
Paper :  Whisper White
Accessories:  Watercolor pencils, blender pens, real red polka dot grosgrain ribbon, smooch

Saturday, November 27, 2010

Glittery snowman card

Here is another card you have the option to make in the create your own stamp-a-stack I'm holding next Sunday, December 5.  It was so simple to make!  I just used the snowflake sizzlit diecut to make plenty of snowflakes.  I arranged them to look like snow falling from the sky - notice the smaller ones at the top and the larger ones at the bottom.  I colored the snowman image from the Tags 'Til Christmas with Marina Mist and punched it out with the 1 3/4" circle punch.   I added a bit of glitter where the tag part is supposed to go (make sure you do NOT color the to/from part!).  Next, I stamped Merry Christmas in Whisper White and embossed it with Irridescent Ice.  For a final touch of glimmer, I put dabs of Crystal Effects in the middle of snowflakes and poured chunky light blue glitter all over it.  Sparkly and sweet!

Stamps:  Tags 'Til Christmas
Ink:  Marina Mist, Whisper White
Paper:  Not Quite Navy, Whisper White
Accessories:  Snowflake die sizzlit, 1 3/4" circle punch, Dazzling Diamonds, Irridescent Ice EP, Chunky blue glitter, crystal effects

Friday, November 26, 2010

Bitty Box of Christmas Tags

When I was trying to decide what to make for my club projects the other day, I ended up noticing that I had the Bitty Box and Envelope die cut and had never even used it!  Don't you just hate it when that happens?  On the other hand, I get really excited because it is a new toy to play with!
So, here is the result of my playing...
I made a Bitty Box out of Sahara Sand and stamp snowflakes on it from the Serene Snowflakes stamp set.  I also stamped a few snowflakes lightly onto my watercolor paper.  On the watercolor paper I stamped the little girl from the Greeting Card Kids stamp set.  I colored her with Always Artichoke, Pink Pirouette, and Sahara Sand.  After distressing the edges and inking them with more Sahara Sand, I put a tiny heart and some clear tinsel in the corner to finish the image. 
I wanted the recipient to be able to use this box again, so I used some wide Pink Pirouette ribbon to make a belly band for the little box. 
 Now, when you open the box, here is what you find! 4 little tags from the Tags 'Til Christmas stamp set.  I punched out several little ornaments and the Do not open until Christmas image and threaded them together.  A rather adorable little ensemble - especially if you do secret Santa! 

Stamps:  Greeting Card Kids, Serene Snowflakes, Tags 'Til Christmas
Ink:  Always Artichoke, Pink Pirouette, Sahara Sand
Paper: Pink Pirouette, Sahara Sand, Very Vanilla. watercolor paper
Accessories:  Bitty Box and Envelope die cut, Ornament punch, 1 1/4" circle punch, Heart to Heart punch, gold threading, pearls, clear tinsel, blender pens

Thursday, November 25, 2010

Elegant medallion Christmas card

Here is one of my favorite cards I recently made.  I used the Medallion stamp in Always Artichoke for the background.  Next, I stamped the large snowflake from the Snow Swirled stamp set in Cherry Cobbler and punched it out with the 1 3/4" circle punch.  I continued the little red dots from the snow flake by coloring in the small dots on the medallion with my Cherry Cobbler marker.  The final touches were the Season's Greetings stamp and the Cherry Cobbler seam binding ribbon between the top and bottom layers.    I really love how this card turned out!

Stamps:  Medallion Background stamp, Snow Swirled
Ink:  Always Artichoke, Cherry Cobbler
Paper:  Always Artichoke, Cherry Cobbler, Very Vanilla
Accessories:  Cherry Cobbler seam binding ribbon, 1 3/4" circle punch, stampin' dimensionals, pearl