Christmas Jingle SS kit, gold thread, Flirty Chocolate Chip ribbon, Ginormous Flowers chipboard.
Sunday, January 31, 2010
Playing with chipboard
Saturday, January 30, 2010
Sweet little additions to our family
I used the Merry Moments patterned paper and Christmas Jingle Simply Scrappin' kit among other supplies to create this page.
Wednesday, January 27, 2010
More simply scrappin'
For these pages I used the Jingle This Simply Scrappin' kit. I loved the sentiments about creating smiles at holiday time and family joy - I thought they went perfectly with the pictures of my daughter playing with her cousin. I added some gold brads, a scallop edge, a mini library clip, and some die cuts from the scribbles and swirls sizzlit. Finally, a touch of ribbon and glitter - and don't forget Rudolph's red brad for his nose! The pages came together quickly....too bad our dear Kentucky Wildcats didn't get their teamwork together more quickly! Oh, well, at least I got some scrapping done during the first loss of the season!
Tuesday, January 26, 2010
Shh...don't tell!
Thursday, January 21, 2010
Hi, Ho, Hi, Ho, it's back to work I go!!!
Both of the projects on this post are inspired by Andrea Walford. The top card is made completely from scraps. I used some of the in colors from last year and the new bird punch to make this card. It's pretty straightforward - the bird wings all have dazzling diamonds glitter on them. I used my new scallop trim punch and the branches were cut out in both chocolate chip and kiwi kiss. I cut out the leaves and glued them on top of the chocolate chip branch so they looked more like a real branch.
Real Red, chocolate chip and very vanilla was the color scheme on this one. I used my I {heart} hearts stamp set for the hearts. The two larger hearts were sprayed with shimmer mist and the smallest heart was punched with a 1/2" circle punch and placed in a build-a-brad.
Monday, January 18, 2010
More sketch inspiration
Friday, January 15, 2010
I {heart} birthdays!
Tuesday, January 12, 2010
Sketches for You challenge
Monday, January 11, 2010
Sketches for you
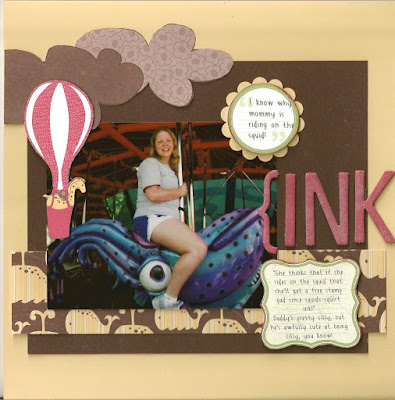
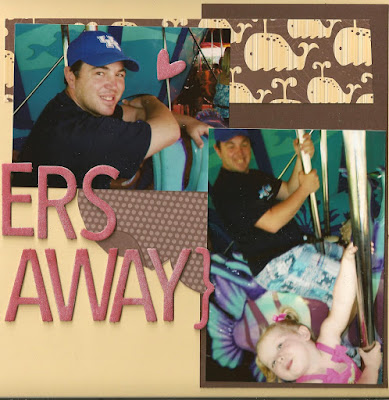
My blogging friend, Renee, showed me a sketch site that focuses on scrapbook pages, so I couldn't resist giving the sketches a few tries. I always do double page layouts, but I was able to get everything except the title on the first page.
I used a So Safron background with Chocolate Chip and Rose Red accents. For my corner accent, I cut out a little giraffe from a piece of patterned paper to look like it was going up and down on the merry go round with me. My journaling spots I made using the Write Stuff download for My Digital Studio. I printed them out on Whisper White paper and cut them out - the 2 part journaling spots worked really well with this page. Finally, for my chipboard letters/heart, I used a brayer to roll on Rose Red ink and then I sprayed them with homemade chocolate chip shimmer mist (I'm in love with that stuff!!!)
Check the Sketches for You website out at: http://sketchesforyou.ning.com/
Saturday, January 9, 2010
Our Sea World pictures were all good, but not great, so I decided to highlight the moments I savored from that trip. Since I was out of brilliant blue paper, I decided to just make my own background using whisper white and brayer over a mask to create a base landscape. I didn't want it to be too busy, so I just made water and sky. I started at the bottom with Tempting Turquoise and Brilliant Blue. At the top, I used Soft Sky and Baja Breeze.
Next, I made a few embellishments to add to my dolphin stickers. On the first page, I made some circles using the Circle Circus stamp set. I stamped the scalloped image in tempting turquoise and the top image in brilliant blue. I always think that the top image looks like water, so I added some turquoise glitter with crystal effects to some of the bubbles and then plain crystal effects to some of the empty bubbles. I ended by using stampin' dimensionals to place it on top of the scalloped circle.
On the second page, I used a stick pin and a scrap of ribbon from my ribbon jar and some seed beads to create a wavy little accent. I didn't want the pin to stick anything, though, so I stuck a stampin' dimensional to the bottom and put a Tempting Turquoise button on top of the dimensional. I added a tiny sliver of brilliant blue to the center of the button to make it look like it was threaded, too.
Friday, January 8, 2010
Michelle Zindorf cases
I cased both of these card ideas from Michelle Zindorf's outstanding tutorials. I have a hostess of our club this weekend who has two boys, so I always try to create some more masculine looking items for her projects. I just couldn't decide which card to use? Which one do you like better?
Thursday, January 7, 2010
Stencil + Shimmer Mist = great background!
I was just so pleased at this thought...I've been loving the idea of the tattered angels plastic stencils that are used for the glimmer mist spray and since I don't have a store anywhere near here that sells things like that, I thought...hmmm. I could make one!
Enter the Tulipe die cut for the Big Shot...I made my own stencil using the die cut and made some fresh chocolate chip homemade shimmer mist. I sprayed the lovely shimmer mist over my stencil onto Old Olive and (blurry as it may be...) I had a lovely shimmery background for my page!
I used the Fresh Cuts stamp set and the Wings of Friendship hostess set for the images. Old Olive, Rose Red, So Saffron, Sahara Sand, Taken With Teal color scheme and a few pearls from the pretties kit. Finally, I stamped/framed the sentiment using the curly label movable die cut. I just cut around the edge of the perforated edges to create the frame and popped the inside up with stampin' dimensionals.
If you want to make this page and a few other projects, the club meeting is Sunday at 3:00 p.m. at my home!
Wednesday, January 6, 2010
Love the new Sweet Pea Stitched Felt!
Enter Sweet Pea Stitched Felt...the name says it all...these felt pieces are just so darling! I LOVE them! Additional supplies used were rose red and chocolate chip cardstock, some stickers from an old Simply Scrappin' kit, old designer paper, and rose red stitched grosgrain ribbon.
Monday, January 4, 2010
Twinking stars
Sunday, January 3, 2010
Magical Memories
All right, enough of my jabbering for now...more tomorrow!
Saturday, January 2, 2010
Happy New Year!
What better way to celebrate the New Year than with some new stamp sets and new cards? I must admit that my dear hubby was so wonderful this Christmas - he gave me a sizzix die cut, several scrapbook idea books, gift certificates to the Melting Pot (a fondue restaurant), and some scrapbook luggage to take on trips with me. Therefore, since I didn't want to hurt his feelings, I felt the urge to use it right away, of course!!!
The next few days I will try to share with you some of the cards and pages I made during my blogging break - a few days with family and friends.
This first card uses the Very Vintage stamp set - Bermuda Bay, Rose Red, and Soft Sude. I just love how the flower edges curl up like a real flower when you wrap it gently around a pencil!
The next two cards I made in the car while riding through Alabama! They both used scraps that I had leftover from the scrapbook pages made while on vacation! I sponged the whisper white card base with Brilliant Blue, then used a scrap of chocolate chip and rose red to mat the Animal Stories patterned paper. Next, I matted a rose red and Brilliant Blue flower on Chocolate Chip paper. I just love that Vintage Vogue set!
I must say that the stark white cardstock base looks so plain next to all of my other cards! I used some more scraps of Animal Stories paper. I matted the patterned paper as well as some Whisper White cardstock on Old Olive. I used the Cheep Talk stamp set with so saffron, Old Olive, and Brilliant Blue. I finished the card off with a few so saffron and brilliant blue brads. While I don't think it is my best card, it's not too bad for making it in the car!
The next few days I will try to share with you some of the cards and pages I made during my blogging break - a few days with family and friends.
Subscribe to:
Posts (Atom)