Showing posts with label scrapbook pages. Show all posts

Saturday, September 15, 2012

Marvelo{us}

I'm starting a vacation album from this past summer, so I thought I'd start with this picture.  This picture was taken right after we arrived in Williamsburg, Virginia.  We ate at this delicious restaurant called Food for Thought - it was delicious, home cooked food and our company with each other was delightful!
My inspiration for this page came from another Scrapbook Trends magazine layout.  I used Tempting Turquoise for the stamp as well as the color spritzer tool.  I made a little hodge podge banner with scraps and bits around my desk. 
The flowers I made with my Floral Frames die cuts.  For the fabric flower above the picture, I spiral cut it and wrapped it around on a Jumbo Sticky Round.  It gave it really nice dimension.
 
Stamps:  In a Word
Ink:  Real Red, Tempting Turquoise
Paper:  Whisper White, Island Indigo, Summer Smooches DSP
Accessories:  Island Indigo Baker's Twine, Bright buttons, Red corduroy brad, mini clothespin, small heart punch, Summer Smooches brads, Color Spritzer tool, Floral Framelits die

Monday, August 13, 2012

Life Shared layout

I made this layout a while back, but I am just now getting around to posting it.  The pictures in the layout to the viewer are pretty blah.....but you have to realize my daughter was making her first forts!  I remember making those as a child.  Do you?  I have great memories of that!  Sure, it leaves the house in a wreck for a while, but those forts are so much fun!  Halleigh even had to take her little brother in the fort to play! 
I thought this Life Shared stamp was just perfect for this particular layout.  I watercolored it using blender pens and the ink welled up on an ink pad.  I also added a few doodles around the frame of the wagon to add a little life around it.

Stamps:  Life Shared
Ink:  StazOn, Lucky Limeade, Riding Hood Red, Wisteria Wonder, Pool Party, So Saffron, Blush Blossom, Basic Black, Basic Grey
Paper:  Crumb Cake, Watercolor paper, Whisper White, Retired DSP
Accessories:  Blender Pen, White gel pen, Wisteria Wonder baker's twine, Wisteria Wonder brads

Sunday, November 21, 2010

Vintage Santa scrapbook page

Did you miss out on my scrapbook club today?  This is one of the projects we made during our club meeting.  I really love the way this page turned out. 
I used a 6X6 basic black background and a photo mat using the Newsprint DSP.   The pleated trim was made using a 3/4" X 8 1/2" strip of real red.  I scallop punch the edge and then crunched it up.  Next I used my distressing tool to peel apart the layers and then pleated it.  Finally, I layered Vintage lace to cover the seam between the two layers.
For Santa, I stamped the Santa face from the Jolly Old St. Nick stamp with StazOn ink on Very Vanilla.  I used my markers to color directly on the image.  I used Sahara Sand to highlight the shadows of the beard and Real Red to color his lips.  I colored his face with Blush Blossom and highlighted his cheeks with Blushing Bride.   As a glimmering finish, I put Dazzling Diamonds on the white trim of his hat and chunky red glitter for the main part of his hat.  I find that if I use Crystal Effects to put the chunky glitter on, it stays much better. 

Stamps:  Jolly Old St. Nick
Ink:  Black StazOn, Charcoal (from Distressing kit)
Paper:  Newsprint DSP, Basic Black, Real Red, Very Vanilla
Accessories:  Stampin' Write markers, Dazzling Diamonds, Chunky Essentials red glitter, Distressing Kit, Victoria Crochet Trim

Tuesday, August 31, 2010

Cute Christmas page

Here is a layout I used with the new Christmas paper - Candy Cane Christmas. It has red sparkly lines and dots on it!  You KNOW I love that!  I wanted to add some circles to the page, so I used them to add some little accents.  For my accents I used the new Cute Christmas stamp set from the holiday mini that is coming out TOMORROW!!!  Yippee!  I love all of the new stuff in the new mini!
Here is an upclose picture of some of the images - I just watercolored and added glitter.  The pictures are not really great because I haven't been able to get home before 9 or 10 at night, so there is no daylight left to help get a clear picture.  Sorry!  We'll try again with the next item I make...
Paper:  Garden Green, Blushing Bride, Baja Breeze, Candy Cane Christmas DSP, Real Red
Ink:  Night of Navy, Marina Mist, Early Espresso, Real Red, Garden Green, Baja Breeze
Stamps:  Cute Christmas
Accessories:  Sponge Daubers, red glitter, circle scissors plus, rub-ons (non-SU), rhinestones (non-SU)

Friday, August 27, 2010

Heat embossing on thick window sheets

I used some of the paper out of the new mini catalogue for this page - it uses Cherry Cobbler and Always Artichoke as a color combo.  I made Cherry Cobbler poinsettias for it with the 5 petal punch - I embossed, spritzed with homemade silver shimmer mist and distressed.  The center is an Always Artichoke brad.  For the title, I used the same clear top note die cut and smudged silver  craft ink (retired) on the edges.  24 hours later it was still wet....so out came the heat embosser!  And out and in popped the top note!  Oh, well.....it made for a very interesting bit of texture on the layout....now if I can just keep it on the page!
Ink:  Silver craft ink
Paper:  Cherry Cobbler, Deck the Halls DSP
Accessories:  Always Artichoke ribbon, thick window sheets, top note die cut, big shot, chipboard numbers (retired), embossing folder, Always Artichoke brads, 5 petal flower punch, heat embosser, alcohol/silver shimmer paint

Saturday, August 21, 2010

I love the owl punch!

Here's a sweet little page using my favorite new punch - the owl punch.  This page was inspired by the Simply Scrappin' class at the Sunny Stampin' online class.  I made almost the entire page out of scraps - just the background pieces were not scraps.
Stamps:  Rough Type, Cheep Talk, Jumble Alphabet
Paper:  Write Stuff DSP, Pacific Point DSP, Pacific Point, Soft Suede
Ink: Pacific Point, Soft Suede
Accessories:  3/4", 1", 1 1/4" circle punches, owl punch, bitty flower punch, rhinestones, stampin' write markers, crystal effects, dazzling diamonds, sponge daubers

Wednesday, January 27, 2010

More simply scrappin'

Here is another set of pages created with the oh, so wonderful simply scrappin' kits! I love the fact that these kits are already put together, all you have to do is decide how to use it! I hardly added anything to the pages that didn't come in the kit!
For these pages I used the Jingle This Simply Scrappin' kit. I loved the sentiments about creating smiles at holiday time and family joy - I thought they went perfectly with the pictures of my daughter playing with her cousin. I added some gold brads, a scallop edge, a mini library clip, and some die cuts from the scribbles and swirls sizzlit. Finally, a touch of ribbon and glitter - and don't forget Rudolph's red brad for his nose! The pages came together quickly....too bad our dear Kentucky Wildcats didn't get their teamwork together more quickly! Oh, well, at least I got some scrapping done during the first loss of the season!

Tuesday, January 12, 2010

Sketches for You challenge

Here is the title page for my next to last layout in our Disney/SeaWorld album...I've been trucking right through this album between vacation, snow days, and some great sketches! Here is the sketch I used for this page. Can you believe I've only used one pack of Animal Stories paper to do this album? I must say, though, that I'm ready to move back into my scrapping with any color scheme I want. I like some albums to stick to a color scheme all the way through and others I just pick randomly what I want in there. One more page and then my own virtual color freedom! Silly, aren't I?!?!


Monday, January 11, 2010

Sketches for you

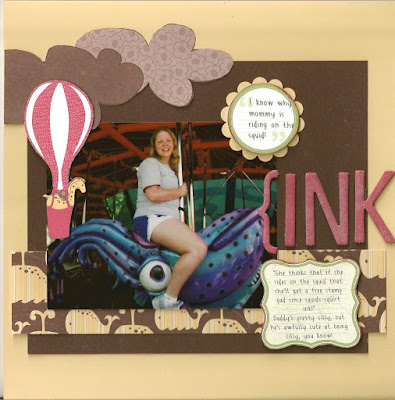
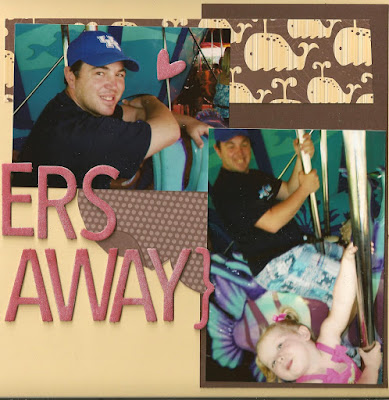
My blogging friend, Renee, showed me a sketch site that focuses on scrapbook pages, so I couldn't resist giving the sketches a few tries. I always do double page layouts, but I was able to get everything except the title on the first page.
I used a So Safron background with Chocolate Chip and Rose Red accents. For my corner accent, I cut out a little giraffe from a piece of patterned paper to look like it was going up and down on the merry go round with me. My journaling spots I made using the Write Stuff download for My Digital Studio. I printed them out on Whisper White paper and cut them out - the 2 part journaling spots worked really well with this page. Finally, for my chipboard letters/heart, I used a brayer to roll on Rose Red ink and then I sprayed them with homemade chocolate chip shimmer mist (I'm in love with that stuff!!!)

Check the Sketches for You website out at: http://sketchesforyou.ning.com/

Wednesday, January 6, 2010

Love the new Sweet Pea Stitched Felt!

Once again, here are some pictures that are necessary for our scrapbook, but they are the kind of pictures that just make me happy when I look at them. Those moments when everyone is just plain happy! Playing on a huge playground in Animal Kingdom after a long day was fun for everyone, so I was just wanted something sweet to remind me of that moment.
Enter Sweet Pea Stitched Felt...the name says it all...these felt pieces are just so darling! I LOVE them! Additional supplies used were rose red and chocolate chip cardstock, some stickers from an old Simply Scrappin' kit, old designer paper, and rose red stitched grosgrain ribbon.

Sunday, March 22, 2009

Take me out to the ballgame...

Here is a layout for our summer vacation album. Toby wore his Phillies jersey to the Detroit Tigers game, so I went with Real Red, Old Olive, Bashful Blue, and Kraft. I saw that color combo in the SU catalogue and thought it would look really good with our pictures. I used my new Frames with a Flourish set for the title and did my journaling above and below the picture set. In the bottom right corner, I made a little picture of "us" using the All in the Family set. I am so proud of myself - it was almost perfect because I was able to use the Stamp-a-ma-jig!


Saturday, March 21, 2009

Step up those pages!


I was inspired to try doing one of these progressive pages at my stamp club meeting this Sunday. I have been trying to make a 6X6" page at each club meeting. I thought this time I would have a ready made 12X12" page to show how you can step up a smaller page and use it on a larger page.
I found this picture of my two darlings - my hubby and my baby. Then I remembered how a few of my friends noticed that the ribbon on her dress looked just like the Rose Red stitched grosgrain, I thought it would be the perfect picture for this page!

Wednesday, March 18, 2009

Scrapbook pages in the Sunshine Garden color scheme

These two layouts are the other two layouts that I made in our scrapbook class the other night. As you can see, there is lots of Sale-a-bration product on those two pages, which, of course, makes it a really inexpensive page to make! Both of the pages use a lot of Big Shot die cuts. What's not to love about choosing your own color coordinated accessories? I just don't know how I lived without the Big Shot for so long!!
Here is where my new Stamp-a-ma-jig became ever so helpful. For the first time ever, I was able to perfectly layer the Certainly Celery flower with the enjoy stamp. Yet, another product that I didn't even know that I'd been missing! Finally, the yellow petals on the accents are made out of a 5 petal punch and the swirls coming away from the enjoy title are the leftover pieces from my swirl.

Sunday, March 8, 2009

Sunshine Garden Scrapbook Class

Preserve you memories forever with this one- of- a kind scrapbook layout! Its soft colors and beautiful design are sure to compliment your photos and bring the freshness of spring into your scrapbook.

You can attend this class on Friday, March 13, 2009 at my home or you can receive instructions via email as well as the materials to make this scrapbook layout when you make a purchase of $50 or more on my Stampin' Up website - http://valeriedurham.stampinup.net
***Please note - the class to go pack is not available to Stampin' Up demonstrators, if you would like more information, please email me.

Please email me to sign up for this class: tvdurham@newwavecomm.net

Supplies• Stamps: Doodle This, Hope Happens• Inks: Basic Black, So Saffron Classic Ink• Paper: Sunshine Garden DP, So Saffron, Certainly Celery, Baja Breeze, Whisper White, Sunshine Garden Die Cut Sheet• Accessories: ?” Striped Baja Breeze Grosgrain Ribbon, Clear Rhinestone brads, Snail Adhesive, ?16 “ handheld circle punch or paper piercer & foam mat, Paper trimmer; Optional: Embossing Buddy

Friday, March 6, 2009

Big shot playtime!


I recently got a new die cut for my Big Shot - the butterfly die cut. Since I've just been waiting to play with it, I decided to try it on a scrapbook page. I noticed lots of grey, blue, and green in the pictures, so I decided to go with the Urban Garden paper. Then, I used some scraps to make the butterflies (notice the visual triangle?!). Finally, I tied both pages together by using the F for Favorite and doodle-pierced a semi-circular pathway for the butterflies.

Wednesday, March 4, 2009

My amazing life

Hereis the final picture collage of our trip Hiking on the Sheltowee Trace this past fall. I went with the colors in my daughter's pajamas - real red, tempting turquoise, and pink pirouette. I used some old SU stickers I had in a drawer and combined those with some flowers from the Polka Dot Punches hostess set and finished this page quickly. I tied all the pictures together with a handmade crocheted hearts from one of my friends and that was a quick, but cute page!

Tuesday, March 3, 2009

Foreshadowing

I know you can't see it in this picture, but Toby's shirt says, "Missouri loves company." It's supposed to be funny, and it is...now....We were backpacking about 10 miles with our not quite 2 year old at the time we took these pictures. After getting over the sore feet, aching back, and my 3 hours of sleep from sleeping in the cold on the ground, I was trying to enjoy our hike again when we ran into major brair patches. Evidently, the Sheltowee Trace trail had not completely been cleaned up after the ice storm (Hopefully not the ice storm 5 years ago!). Needless to say, I couldn't think of a more succinct title for this page - Foreshadowing.

Monday, March 2, 2009

My cherry amour

I made this layout based on this cute little outfit Halleigh was wearing. I loved the little cherry motif on her outfit, so the cherry from the Goody Goody Gumdrop hostess set was perfect for this page! I wasn't sure how to use red, green and pink all on the same page, but the colors matched her shirt perfectly, so after I was able to find a good balance, I thought it worked okay. I made the green galore stems using the Sweetest Stems embosslit.

Sunday, March 1, 2009

Travel album page cover

I made this page last night. Toby knew I was happy to finally get some scrapping done this weekend. To me, it is a terrible shame to have to go all week and not get to do any scrapping and stamping! Anyway, I finished my other album of everyday life, so I am ready to go back and do my Summer Vacation album. I started with a very simple and cheap layout to do. I used mostly scraps, the free paper and ribbon from the Sale-a-Bration catalogue and a few punches and ended up with a nice, clean image for our Canadian vacation album from last year. We'll see what comes next!

Monday, February 23, 2009

A tree for our hike!

Well, it's not very clear, but you can get the idea of the page I made last night. We went hiking in Morehead on the Sheltowee Trace last fall, so these pictures were from the beginning of our hike. I had a picture of the turtle, the Sheltowee Trace path symbol. I wanted to show how it was the symbol we followed throughout the hike, but I didn't want it to take up too much space. I thought a little while and decided I would make a tree on which the turtle could be displayed - just like on our hike.
To make the tree I first cut out several leaves in Old Olive using a Provocraft set of leaves I found in the fall. Next, I used sticky strips and LOTS of messy glue to wind common jute around to make a trunk. I stamped several of those circular spray images (I don't know how else to describe them!) onto Kiwi Kiss from the Good Friend set and cut them out with a circle punch. Layering them on with stampin' dimensionals finished off my tree. Finally, I added the turtle symbol.
To finish the page, I grouped all of the pictures together in the center of the pages and round the outside corner edges. After adding a Making Memories tag for the title and journaling, I made a little birdie using more Kiwi Kiss and Chocolate Chip ink. The legs and beak are More Mustard. I thought it was a good final touch to our page.