Thursday, June 30, 2011

Mother of Pearl

Here's a little peek at one of the projects we are going to make at the new catalogue open house this Saturday.  It uses a technique I found in a recent Stampin' Success magazine that Stampin' Up gives it's demonstrators. 
 This technique is called mother of pearl.  I used the new lace ribbon border punch and a color combo of Rich Razzleberry, Pool Party, and Island Indigo.  The stamp set is Strength and Hope - it was one of my first stamp sets from the summer mini catalogue.
As you can see, I made two different versions of the same card.  Partly to experiment and partly just to show that you can do lots of different things with the same materials.  Everyone is ddifferent and everyone has their own style and tastes!  My personal favorite is the card above.  I love the pool party color with the mother of pearl technique. 
Here is the Island Indigo background.  It almost looks like Not Quite Navy, although the color is actually a bit brighter in real life. 

Here you can see that I stamped the butterfly image on the background sheet using StazOn ink so it wouldn't smear.  That leaves the antannae there for you to see when you add the actual butterfly with Stampin' Dimensionals.
I tried my best, but I just couldn't get a good picture to show the shimmery mother of pearl effect.  If you've made it this far in my post, congrats for persevering through my jabber!  To get the mother of pearl effect, I took just a dab of Pearl Shimmer Paint with a piece of plastic wrap I was throwing away and pounced it on the Whisper White background.  Next I dried the paint - just a few seconds with the heat gun.  Finally, I sponged Island Indigo ink all over the Whisper White paper.  It's really gorgeous in real life! 
So, if you want to try it out yourself, come on over on Saturday!  Leave me a comment with your phone or email if you live near Somerset, KY and I'll be happy to give you directions!

Wednesday, June 29, 2011

Playful Petals Triple Flip mini scrapbook album class coming soon!

The Playful Petals Triple Flip mini scrapbook album flips open to reveal 14 different page layouts. At 5 ¾” x 5 ¾” this fun album is compact enough, and easy enough to make that you can gift it to long distance friends or family; but at the same time it has enough pages that you have plenty of room to preserve those special memories. 
Saturday, July 16 at 1:00 at my home (email me for directions at tvdurham @ newwavecomm . net )

You MUST pre-register before July 10 to participate in this class. I will need to purchase a kit for each participant.

Cost $20

***Free shipping on all orders placed during this class.

Tuesday, June 28, 2011

Summertime Centerpieces

The Paper Trailmakers Blog has an open challenge, so I thought I would make these summertime centerpieces.  I had to make centerpieces for a banquet, but I wanted them to last so I could use them again in September. 
I used the Celebrations patterned paper so it would have a birthday feel.
I used basket filler and placed a foam piece inside to hold the flowers in. 
I cut out the pictures and a backing piece using the Top Note die - I cut the pictures on the perforated edge so they would be matted on the background piece. 
I also made a few pennants using the the new die cut that will be available on July 1. 
I used the Fun Flowers diecut to create the flowers.  I curled the ends of the flowers using my distressing tool - my favorite for curling ends.  I hot glued each piece to the next so it would have super holding power and give it some dimension (only one finger got glued to a button!!!Ouch!)
Finally, I finished it all off with some blue organza ribbon that my friend Angel gave me.  Angel - if you're reading this WE MISS YOU!!!!!!!!

Monday, June 27, 2011

Smile

I have been using up some of my Lawn Party kit from Studio Calico.  It's almost time for July's kit, so I'm trying to use up what I've got to clear out some more space!  I had these pictures and decided to only pull the orange rather than the blue and orange. 
I was probably a little silly here, but her hand was in just the perfect position to add that little pennant like she's holding a flag!  I took about half of a sheet of making memories Note worthy pad of journaling spots for this - it was just the right color.  I added a little peach spica glitter pen to the flower centers, too.
I loved this hand-stitched tag just the way it was, so I added a little Pebbles flower and popped it on for a quick and appropriate title.   I cut out a flower and added it directly over the picture and the same butterfly on the patterned paper.

Friday, June 24, 2011

Sneak peek at my new fave stamp set!


I love the simplicity of this sketch from Sassy Lil' Card Sketches, so I just had to play with my new favorite stamp set - Delicate Doilies.  Doesn't it just sound delightful?!
And here is a sneak peek of a new in color as well - Pool Party.  This is a color combo from the Color Coach cards - Pool Party, So Saffron, and Not Quite Navy.  Gorgeous!
I used Delicate Doilies for the background and some scraps of retired ribbon and paper for the next layers.  I stamped the hello sentiment from one of the hostess sets in the summer mini, and the butterfly from the Strengtha nd Hope set.  
Here's a closer look at the butterfly.  I stamped it twice.  Once for the bottom piece on the doily die cut.  To create the top butterfly I smeared VersaMark over it and pounced So Saffron chalk all over it.  I then spritzed that with Gold Smooch Spritz and placed it on top of the die cut with Stampin' Dimensionals.  I finished it all off with pearls. 

Thursday, June 23, 2011

Sassy Lil sketch with 5 photos!

I wasn't sure how I would do with this sketch.  I liked the simplicity of the sketch and I loved that it had lots of photos, but I didn't want my page to end up too busy!  I ended up with this page:
Ah, just some more cute little pictures of our endless snow days from this past winter.  The journaling refers to the fact that it snowed every week for about 12 weeks in a row this year!  Kinda' crazy for Kentucky!
Here's a closeup of the title and embellishments.  I used some more snowflakes and Heidi Grace flowers for my visual triangle.  The letters are Noteworthy from Making Memories.  I used part of the packaging for the journaling spot.  I also used some Heidi Grace epoxy stickers for the borders and the epoxy hearts at the title.  They are pretty transluscent, though, so you can barely see them

Wednesday, June 22, 2011

Sketchy Thursday sketch


Well, I am glad my old pal blogger decided to work this afternoon.  I finally gave up earlier this morning on trying to make this post as it would not let me post any pictures.  What good is that?!??! 
Anyway, here is a sketch I used for this page:
It's a super soft look against that white background.  It is just retired SU designer paper for the entire page.  I don't recall the name, but it is all from the same line.  The colors are Pink Pirouette, So Saffron, Ballet Blue?, and Chocolate Chip. 
Here's a little closeup of my snowflakes - I cut them out with my sizzix.  Love them!  I added the tinsel ribbon that was in the holiday mini last year and some Heidi Grace flowers/brads/heart epoxy stickers.

Link to my newsletter

Click here to download my Stampin Up newsletter

Tuesday, June 21, 2011

Berry Sweet with Tart and Tangy

Wait!  This is not the berry sweet layout that I was trying to put on my page!  How did this get in here?  I guess I had a little scrapbook layout that was a little too big for my white cloth I always lay below it!  Wink, wink! 
Here is a layout I made using the retired Soft Sky cardstock as well as some retired floral DSP I got from the clearance rack.  You will also notice a darling little strawberry paper on the layout, too - I got that from a Studio Calico kit. 
I punched a few of the strawberries from the paper out and added Dazzling Diamonds to it.  I also stamped 3 strawberries from the retiring Tart & Tangy set using Kiwi Kiss and Real Red.    I colored the seeds black and then heat embossed them with Irridescent Ice.  Underneath I punched circles out of Kiwi Kiss and Real Red and used the faux suede technique to add a little texture to them. 

Stamps:  Tart & Tangy
Ink:  Kiwi Kiss, Real Red, Basic Black
Paper:  Soft Sky, Retired DSP, Studio Calico DSP
Accessories:  circle punches (3/4", 1", 1 3/8" 1 3/4"), Swirl sizzlit die cut, Dazzling Diamonds, Irridescent Ice EP, Letters (making memories, Studio Calico), Pennant (Pebbles), Label stickers (October Afternoon)

Monday, June 20, 2011

Friday Fun Day sketch & Sketches in Thyme sketch

Okay, here's a quickie little post.  I need to work on my SU newsletter before this month is over!  Here is a sketch from Lucky Girl Crafts.  I used my Lucky Girl kit I got with some Lucky bucks for this sketch.
I masked the whisper white paper with doilies and sprayed lightely with Lemonade Mr. Huey.  I used a few pieces and stamped a journaling spot with Notes & Details.  It was a simple page with a soft look.
Here's a closeup - I punched the title - it was a rectangle sticker, but I liked the look of it with my 2 1/2" circle punch and the scallop circle behind it.
Now for a sketch from Sketches in Thyme.
I loved this circle die cut page.  I added a few other piece of patterned paper from the kit a bit of pink tulle and a soft creamy flower.  I finished it off with a few retired SU rub-ons.  Quick and easy peasy!  And oh, so pretty!  :)


Saturday, June 18, 2011

Atari boy

I recently got this really cool October Afternoon paper from a Studio Calico kit....but I thought, how in the world am I ever going to use this stuff....I don't have a boy!  Well....just not a little boy!  I have one of those overgrown boys we call husbands! 
They still love their old school Atari games, so I found this picture I took of him playing an old school style arcade game back in the winter.  Immediately I thought...I know exactly what I can do with this paper! 

Friday, June 17, 2011

Dinosaur roar

I haven't had a huge amount of time this week to scrap and play - just too much stuff to do! I hit the ground running as soon as I returned from vacation. I had to unpack, do laundry, and get ready for not only a youth group trip to Icthus, a huge Christian music festival, but also prepare centerpieces for a banquet and a 15 minute presentation for a music educators symposium this week! In the midst of my chaos I ended up hot gluing a button to my finger on accident.....now the hot glue gun is my frenemy!
But enough of my silliness!  Here is a quick page I put together using MDS and the Sunset Serenade suite again.  I believe this particular set of paper and stamp brushes are exclusive to My Digital Studio.  I still just love it, though!  It's fascinating that in My Digital Studio colors never retire.  So in this set of paper not only do you find the current in color, Peach Parfait, you also find the retired Brocade Blue.  Interesting! 
So, anyway, I think I'm mostly pleased with how this page turned out.  I may have to tweak some bits about it, but I really like the rain falling out of the clouds where my daughter is playing dinosaur in the waterfall!  The best part of digital is...I can make the rain as transluscent as I like, and unlike a rub-on, it will never crack apart!  Hee hee! 
Have a dino-mite day!

Wednesday, June 15, 2011

ScrapFIT Workout #46 Schools Out For Summer

Workout #46 Schools Out For Summer


That’s right, its already that time of year! Lets show a little school spirit in this Workout! You can do this a number of ways, maybe with some school themed paper, or get creative with some school stamps, include a math equation or maybe you have some great school supplies you can use on your layout! Put your best effort in and lets see if you can get A+!
For my project I decided to use this set of digital papers and stamps from My Digital Studio by Stampin' Up.  I purchased the set when it was 30% off last month and this was my first chance to play with it.  I really love this background paper because you don't neeed to add a whole lot to it to make your picture pop.  I used two of the frames that are in the Sunset Serenade stamp brush set and used a few So Saffron punches behind it so the title would not get washed out.  I added the little girl from the same stamp brush set and flipped her direction so she was looking at my daughter.  I added photo mat, some simple stitching and journaling and it made a super quick page!
In case you're wondering....my daughter was giving us a dance concert while we were eating at a restaurant at Disney World the other day - this was her serious dance!  What a sight she is!
 
Now for our sponsors for this month's prizes....
Scrapbook Circle


Garden Party Kit - One of this months prizes!!!

Our second sponsor is Chelle's Creations


Now, hop on over to ScrapFIT to get your workout on

Tuesday, June 14, 2011

Goodbye Tart and Tangy Class

Wow!  Did you miss me?  I have been on vacation - we spent the last week at Walt Disney World and all of the Disney parks in Orlando, Florida.  So, while I actually had all of these pictures taken and ready to post, the internet at the hotel where we stayed was not included.  In fact, it was just a mere $9.95 a day to use (crazy, I know!).  Needless to say, we just enjoyed our vacation and I decided the blog and my SU newsletter would just have to wait.  So....if you're waiting for your newsletter, that is on the agenda for this week!   Here's a little sneak preview of what you're going to find in it. 
I have a tutorial for this set of Tart and Tangy cards and a box from Andrea Walford.  While the designer series paper she used is retired, I decided to update the look of this this set of cards and box using our current papers and a refreshed color combo using my Color Coach.
Here is the box that holds the cards.  They are the 5 X 3/12" notecards that are sold in the big catalogue.
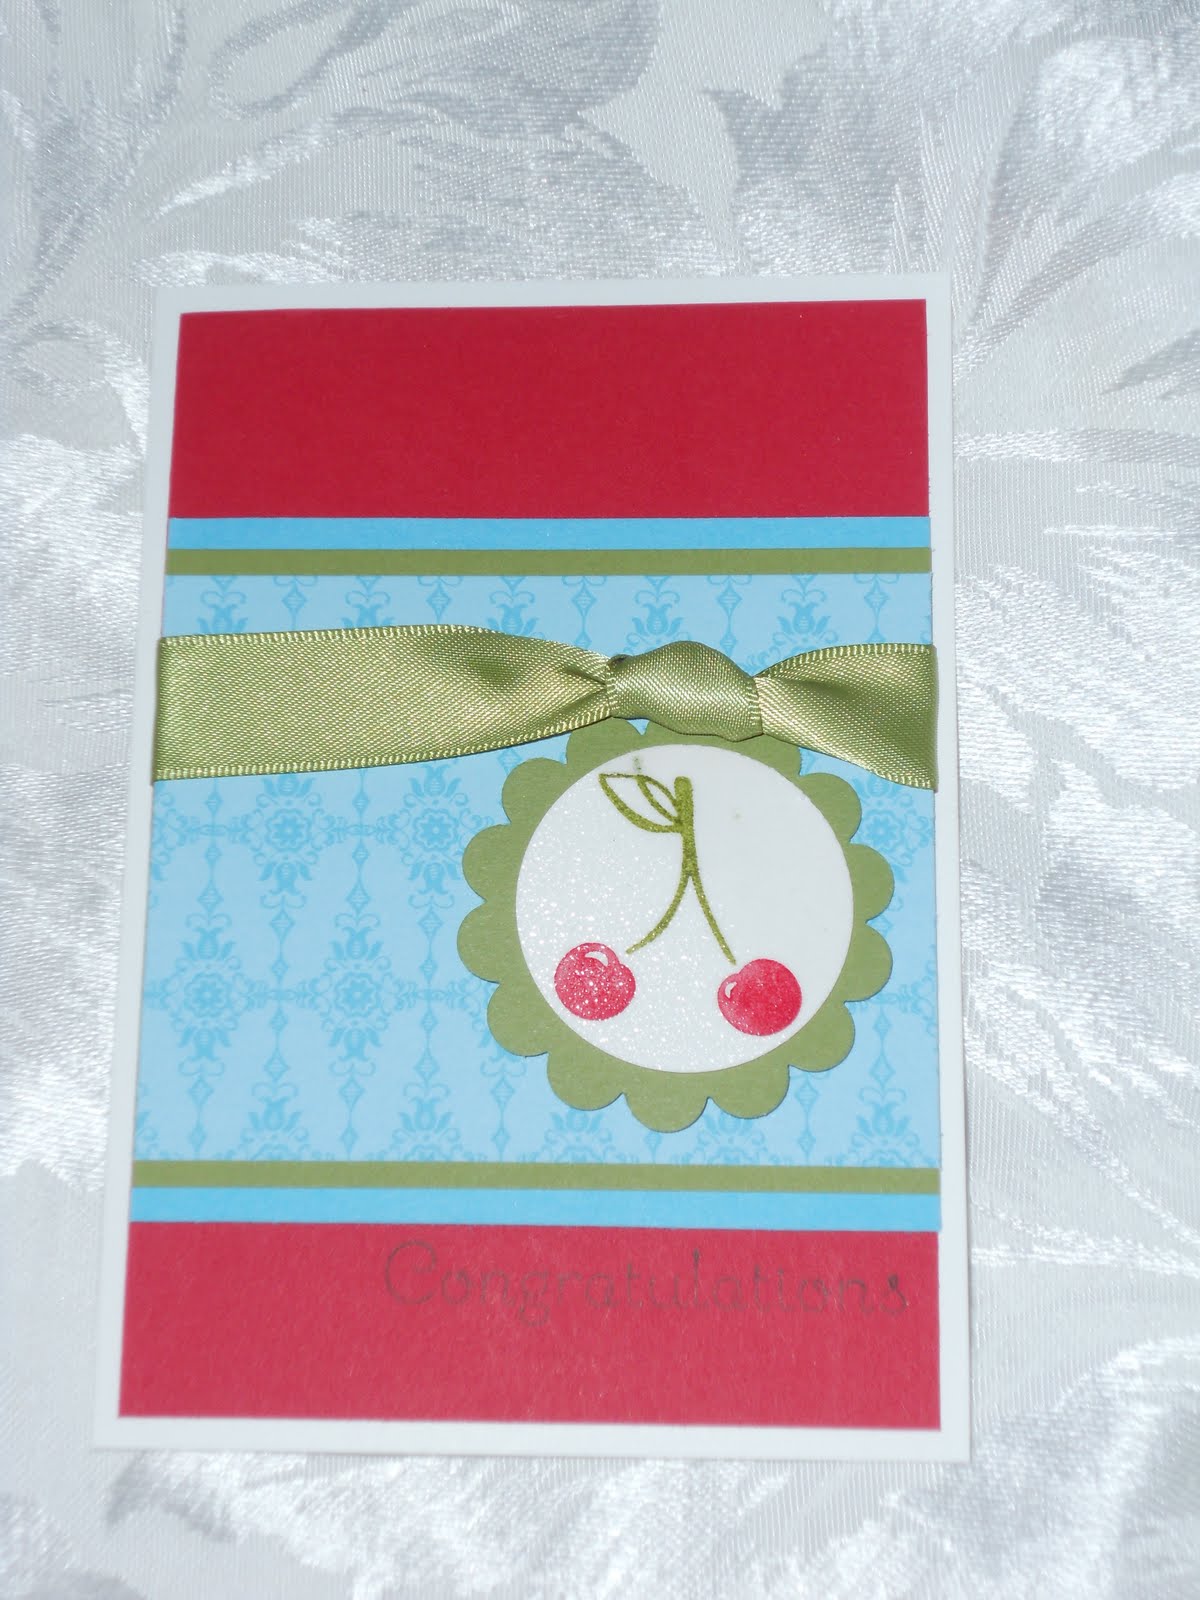
This is one of the cards - you can't see the sentiment in this picture, but I basically used all occasion sentiments so you could use the cards for any occasion you need cards for.
Here's a berry sweet thank you card!
An apple a day makes the heart sweeter in this sympathy card.
Here's the Tangerine Tango embossing powder.  Love this stuff! 
So, if you like this set of cards, you can make a set for yourself!   If you are a current club member, my thank you to you because I love my club members is this free class!  Yeah for free classes!
If you are not a current club member but you are paying your $10 fee to join next year's club, you get to take this class for half price!
Finally, if you just want to make some cute and adorable cards, you can join me to make this set of cards for just $10! 
The class will be held on two dates - Friday, June 24 at 10:00 a.m. or Sunday, June 26 at 3:00 p.m.  Please make sure and contact me by email, facebook, or phone to sign up for this class.  You can find my information on my SU website in the sidebar.
************************************************************************************
ScrapFIT Design Team Call

August 2011 – January 2012

Submission Deadline – July 2nd

ScrapFIT (www.scrapfit.blogspot.com) is a growing scrapbook challenge blog that will give you a real workout! We have 2 workouts (challenges) per month and they are sure to push you out of your comfort zone and inspire you to try something new! We are looking for 10 fun and creative designers (aka -FITgirls!) for our next term!

FITgirl Requirements:

*You must have an active blog

*You must be commit to 2 layouts per month based on our challenges

*A person who enjoys inspiring others

*Someone who is committed and turns in projects on time

*Someone with enthusiasm for ScrapFIT and their challenges and the dedication to help promote ScrapFIT through their own blog and other site they participate in.

What To Expect From ScrapFIT

*Although this is not a paying gig we can help spread the word about your scrapbooking awesomeness!

*A special FITgirl blinki for your blog

*Your photo, name and link to your personal blog on the main ScrapFIT webpage!

*A great addition to your scrapbook resume

*All of the challenges will be giving to you at the start of your term so that you have plenty of time to work on them when you have the chance.

*A fun and relaxed group to work with.

To apply please send the fallowing information to scrapfit@twcny.rr.com by July 2nd:

Please put ScrapFIT DT Call in the subject line

1) Name

2) Address

3)Email Address

4) Link to your blog and/or online gallery

5)List of other Design Teams past and current

6)3 examples of your best work. Let us see your style!

7)Tell us why you would be a good fit for our team!

8)A little bio about your –if you are chosen this would be your introduction bio.

Winners will be announced on July 8th. GOOD LUCK TO EVERYONE!

Wednesday, June 1, 2011

ScrapFIT Workout - Around the House

Have you ever stopped to think about what items you have around the house to help aid your scrapbook creativity? There are hundreds of items you can use either directly on your layout (ex: a tag that came off a new piece of clothing) or to aid you in creating a technique on your layout (ex: run your sons hot wheels car through your ink pad and then run it on your paper for a great tire effect). Lets see what you can find around the house to make this layout awesome!

Yeah! I finally got blogger to work again! I couldn't load up any of my pictures for the past week....argh!
Anyway, here is my project I made for this challenge. I made little party favors for a graduation banquet. I started with the Stampin' Store containers. You can purchase these in packages of 6, or you can just use empty ones like I did. I have plenty of containers that held buttons and I hated to just throw them away. I decided they would be perfect to hold little pieces of candy at our graduation banquet at church..

So here is the top of the container.  I cut a 3X3 square of basic black paper and poked a hole in the center to hang a tassle.  I held the tassle in place with a black glimmer brad. 
For the sides, I ran a piece of Sticky Strip all the way around and then placed a piece of basic black satin ribbon along the bottom edge of the container.  (If you get it too high, the container doesn't close easily).
On the bottom I simply punched a 2 1/2 inch circle out of basic black paper.
On the inside I punched a 2 3/8" scallop circle to cover the plastic area.  I didn't have to do that, but I wanted a clean area to place mints!
Now for the final touch, I stamped this sentiment from Word Play on a piece of Whisper White cardstock.  I colored the stamp with basic black and a matching school color for the arrow.  So, for this hat I colored the arrow cherry cobbler since the color this high school is maroon. 
I made about 10 of these little graduation hats - they were so easy and cute! 
 
Now for our sponsors for this month as prizes....

Garden Party Kit - One of this months prizes!!!


Scrapbook Circle is a monthly kit club that has been creating kits for almost 5 years and loves getting to share these kits each month. We offer a 2+ month subscription which means that you only commit to receiving two kits and then you can go month to month and quit at any time.

We combine multiple manufactures each month for a unique kit that you won't find anywhere else. We also include a Scrapbook Circle custom printable page that coordinates with each monthly kit.

Our May Kit, Grandma's Attic, is filled with brand new products we ordered at CHA and we are excited to share it with you. This month is Scrapboook Circle's 5th Anniversary and they are also offering an Anniversary Kit with a huge discount to any of their subscribers.

Be sure to visit the Scrapbook Circle Idea Page and Blog for daily inspiration. You can also join us on Facebook where we do kit giveaways and you can follow us on Twitter too.

Our second sponsor is Chelle's Creations


Chelle's Creations is our very first DIGI Sponsor!!! I am so excited to offer all our digi scrappers an opportunity to play along for a great prize - a $7.00 gift certificate to Chelle's Creations! This will easily get you one great kit of your choice from her store!


Now, hop on over to ScrapFIT to get your workout on!