Tuesday, January 31, 2012

Guest Designer: Jenny West

One of my sweet customers and scrapbook friends, Jenny West sent me a few pictures of some cards she has been making while spending some time in sunny Florida.  Can you believe she just threw some stuff together to take with her and wound up with these gorgeous cards?!  I am loving them all! 
I think I love this one the most - I love the little scallop ribbon bow across the center - so neat and petite!  I don't think I could part with such a pretty card!
I believe the stamp set here is called the Language of Friendship - it works so well with the Bird Builder Punch.  I definitely agree with Jenny that the stamp and punch combination is one of my favorite ways to make cards!
This card has some great texture - from the stamped background and the lattice embossing folder to the elegant ribbon.  Lovely!!!
Here's some nice Rich Razzleberry - and a butterfly stamp set that I just adore!!!  The name of that stamp set is Butterfly Prints.  Definitely on the wish list! 
And one final card - I am not sure how she made that heart - It looks like a stamp, but it is definitely one gorgeous card!!!!  I love how the word Love really pops out.  The sentiment below is from the Teeny Tiny Wishes stamp set.  Another set that I just can't use enough - great for all occasions!

Thanks, Jenny for sharing your talents and beautiful creations with us!  Enjoy yourself in beautiful, sunny Florida.  I can't wait to see what else you and your sister Carol have come up with - together Jenny and Carol make a definitely dynamic duo!!!

Monday, January 30, 2012

Fashionable Hearts card

Before I post today, I just want to say that I'm thinking of my dear friend, Hannah, who lost her father this past week.  I know how close she was to him and I know coming back to work will be hard, Hannah, but you are strong and brave!  Love you, dear!

On another random thought....congratulations go out to my oh, so creative customer, Carolyn M.  She was the winner of a great prize pack from Papercrafter's Library blog this week!  Lucky Carolyn - I guarantee she has some pretty neat stuff she'll make with that treasure!  Her sister, Jenny, sent me some pics of some darling cards she made, so if she doesn't mind, I'll try and feature those cards on the blog later this week!

Enough chatter, eh?  On with the card....
We made this card at our club meeting recently.  You may remember a butterfly card that I created using the in colors.  This is the exact same sketch, same faux stitching, just a different stamp set and different Embosslit!

Stamps:  With All My Heart
Ink:  Riding Hood Red
Paper:  Blushing Bride, Riding Hood Red, Soft Suede, Very Vanilla
Accessories:  Mat pack, White uniball gel pen, Fashionable Hearts Embosslit

Sunday, January 29, 2012

Club scrapbook page

Here is the page we made recently at our scrapbook club to showcase some of the new products in the spring mini catalogue. 
We used the Blushing Bride Smooch Spritz along with a touch of Log Cabin Smooch Spritz to color the paper flower on the left side of the page.
On the right side, a journaling spot was made using the Apothecary Art stamp set.  We watercolored the flowers and then ran it through the Big Shot with the new Labels Framelits. 

Stamps:  Apothecary Art
Ink:  Marina Mist, Soft Suede, Pink Pirouette, StazOn
Paper:  Soft Suede, Very Vanilla, Beau Chateau DSP
Accessories:  Baja Breeze corduroy brad, Pink Pirouette ribbon, Labels Framelits, Blender Pens, Paper Flowers, Blushing Bride and Log Cabin Smooch Spritz


Saturday, January 28, 2012

Pregnancy journal page

I took this picture the other day and thought it was so adorable, I thought it would be a great picture to accompany a pretty routine journaling spot.
For my journaling spot I used one of the Nursery Nest Quick Accent sticker and made a mat for it out of Marina Mist.  I cropped the corners with my ticket punch.  I popped this up with Stampi' Dimensionals and placed it on a Basic Grey square.  The corners were a little plain, so I added these flocked blue brads by Creative Imagination that I found at Archivers the other day.
Nothing too special here....just a bunch of fingerprints on the picture, evidently!!!!!  ACK!

Ink:  Basic Grey
Paper:  Nursery Nest DSP, Basic Grey, Marina Mist
Accessories:  Ticket corner punch, Nursery Nest Quick Accents, Flocked brads (CI)

Thursday, January 26, 2012

Sale-a-Bration and a layout!


It's the most wonderful time of the year!  At least it is if you like Stampin' Up products!  You receive a free Sale-a-Bration product for every $50 you spend! Click on the links above to learn more! 
 
Don't pass out....I finally finished another layout!  I know....without snow days it's tough to get anything done....such a bummer!
I loved the scenery in this picture from For Your Inspiration, so I created this nice, summery page to make up for no snow and no summery weather!
I used the Simply Scrappin' kit from last year's summer mini for this page.  I used the basic layout sketch from one I saw on Papercrafter's Library.  Here is the left side.  I layered a few flower and circle stickers.  I painted the top circle with Smooch Illuminate and added a Rose Red button to the top.  The letter stickers are Thickers from American Crafts.  I've run out of enough chipboard letters for this title!! 
Here is the right side - Just a little panel of pics and a tiny journaling tab at the top.  Since it was at the top, I just let it hang off just a tiny bit.  I layered a banner sticker and Pumpkin Pie button to gussy it up just a tiny bit.  (By the way....did you know you can get those Brights Buttons for FREE?!??!  Check out the Sale-a-Bration link for more details!)
Overall, not too difficult a page and nice bright colors for the late summery soccer season!

Ink:  Rose Red
Paper:  Daffodil Delight, Old Olive, Rose Red, Simply Scrappin' DSP (retired)
Accessories:  Simply Scrappin' kit (retired), Brights buttons, scallop trim border punch, Smooch Illuminate top coat

Wednesday, January 18, 2012

Everyday Enchantment Notecard and pocket

I have seen these little notecards in a pocket design for a while now and wanted to make one.  I finally bit the bullet last night since our internet and phone service was out.   It wasn't too difficult to create and I was quite pleased with the way it all turned out!  I started with the Everyday Enchantment patterned paper that is free in the Sale-a-Bration catalogue.  I added some of the free ribbon and brads around the pocket.  Love these little bows - they are just so pretty and easy!
For the actual note card, I cut out two Top Note die cuts.  I colored my flourish from the Fresh Vintage stamp set with my Poppy Parade, Lucky Limeade, and Pool Party markers first, then stamped.  You may notice I stamped once - the vibrant image, then I stamped off on the right side - it gives you a more watermark look with the remaining ink. 

So, what kind of project would you like me to make next?  What kind of project or technique would you like for me to attempt another video of?  Leave me a comment and I'll see what I can whip up for you!  I'm pretty certain there's another snowy streak sneaking around here!!!

Stamps:  Fresh Vintage
Ink:  Poppy Parade, lucky Limeade, Pool Party
Paper:  Everyday Enchantment DSP, Soft Suede, Poppy Parade, Very Vanilla
Accessories:  Everyday Enchantment ribbon and brad pack (SAB), scallop trim punch, top note die cut, Simply Scored

Tuesday, January 17, 2012

Help vote for me!

I need your help! I was selected to participate in a layout contest on Practical Scrappers, so I need you to vote for my layout! My layout is the first layout in this post. all you have to do is go to the bottom of the post and vote - nothing fancy! I would love to make it to the next round! Thanks for helping!
http://www.practicalscrappers.com/2012/01/layout-contest-group-5_17.html
Here's a card I cased from the UStamp online class.  I changed up the colors to make it more colorful.  The original card was crumb cake and whisper white.  I decided to go with Pool Party, Lucky Limeade, and Wisteria Wonder.  Loved the color combo and the way it looked after I was finished.   Best of all, it's faux stitching! Very simple!

Stamps:  Elementary Elegance
Ink:  Island Indigo
Paper:  Pool Party, Lucky Limeade, and Wisteria Wonder
Accessories:  Uniball White Signo gel pen, Simply Scored, Mat Pack, Paper Piercer, Butterfly embosslit, basic pearls

Monday, January 16, 2012

How do I love thee? Let me count the ways.....


First, a sweet little picture of my big old bump.  We have 2 1/2 months until Baby Owen arrives, so I thought this would make a cute little picture for the album.
Here is a little coupon book.....ways I love you book.....money holder.....whatever use you would like pocket book!  I think we will make this on Sunday at our club meeting.  It was a great way to use the Petite Pocket die cut in a different way than normal. 
I got the idea for this book from the Louisville regional Stampin' Up conference I attended.  They used a different stamp set that I didn't have.  As much as I loved the stamp set they used....I wasn't going to buy it just for one project.  I am the kind of person who just uses what they have to fix my projects up.  So, with that being said, I used this stamp set, P.S. I Love You, from the mini catalogue.  It had such a variety of valentine stamps, I just really liked it. 
I kept everything pretty much the same.  The last card I made I added the large heart stamp.  I first colored it with my Blushing Bride marker.  Next, I added some Cherry Cobbler hearts with my Cherry Cobbler marker.  I finished by thumping my Soft Suede marker around the edge of the heart.  I like the way it kind of defines the border.

Stamps:  P.S. I Love You
Ink:  Blushing Bride, Cherry Cobbler, Soft Suede
Paper:  Blushing Bride, Soft Suede, Vanilla confetti paper
Accessories:  Trinket Keys, Soft Suede taffeta ribbon, 1" square punch, Bitty Scallop Circle punch, silver brads, Petite Pocket die cut

Sunday, January 15, 2012

Thank you cards for my online customers

I have had a few online orders in the last weeks, so I thought I should make nice little cards to send them to say thanks.  I had these simply sent cards that I have had for a year or two.  They were just too pretty to use!  This is my New Year's resolution - there is no such thing as too pretty to use!
So....I decided to stamp the thanks from the Outlined Occasions stamp set on the outside in Soft Suede ink and colored it in with my Crushed Curry marker.  I added a few small star punches with Soft Suede scraps.  To finish it off, I topped of the tiny stars and the middle punched star with Illuminate Smooch Top Coat - neat and clean shimmer!
Here is the inside of the card - again - love that this stamp set provides an easy way to continue on to the inside of the card.  You don't have to do much - just add a little something!

Sale-a-Bration starts January 24! 

Friday, January 13, 2012

SAB sneak peek!

Here is a preview of one of the whimsical stamp sets in the Sale-a-Bration catalogue.  It is called Sprinkled Expressions.  Very fun and super easy to use!
For this card I decided to use the Big Top Birthday DSP.   It seems like a fun, whimsical stamp set to use with this paper - a natural match! 
You'll notice I pierced holes around the edge of the 2 3/4" white square after I stamped the flower. 
Remember - starting January 24, you can get this stamp set and loads of other products for FREE with EVERY purchase of $50 or more!!!

Stamps:  Sprinkled Expressions
Ink:  Tempting Turquoise
Paper:  Real Red, Tempting Turquoise, Whisper White, Big Top Birthday DSP
Accessories:  Real Red Satin Ribbon, Paper Piercing tool and Mat Pack 

Tuesday, January 10, 2012

A Year in Review MDS Album

I am an avid lover of My Digital Studio.  While I'm not the kind to make all of my scrapbooks digitally, I love the ease of making pages digitally.   I love the fact that I can print digital albums out and they only take a minimal amount of space on my bookshelf!  I love that they are very portable.  And, I LOVE that I can find templates on my Stampin' Up website that have pre-made albums that I can customize to my own liking.  It makes the time it takes to make an album much shorter and it also allows me to change things if I don't like them or if I just need to change sizes! 

I will say that I am NOT a computer guru....not a photoshop gal - way too over my head!  But, I am definitely an MDS gal.  So, enough of my silliness - enjoy a year in review album that I made over the weekend.   :)

Monday, January 9, 2012

One Card, 3 Ways

I saw a similar card on UStamp this weekend and just adored the watercoloring on the card. I loved the simplicity of the layout and the stunning results, so I decided to re-create the card with my own versions. This time, I decided I would make 3 versions of the card - just to see how they turned out differently.
Essentially all of the cards are the same - the same measurements, same stamps, same basic color scheme. The colors obviously change, the embossing folder changes, and the method of coloring changed for each card.
For this card, I used my traditional method of coloring - starting with the ink in the lid of my stamp pad and my blender pen and AquaPainters.  I colored the flowers with Blushing Bride and Baja Breeze, leaves with Pear Pizzazz.  I went back over each with Old Olive, Riding Hood Red, and Island Indigo. 
So, here is where I tried a new technique.  I wasn't really sure if I liked this at first, but I think with a final glance, I really like it.  In this method I used the same exact colors.  This time, though, I started with the brush end of my Stampin' Write markers and outlined each edge of the images.  I then took my blender pen and Aqua Painter and pushed the color around until the image was sufficiently filled.  It's a great way to use your Stampin' Write markers and get a beautiful effect!
And, finally, I couldn't resist playing with my Copic Markers while I was waiting on my watercolors to dry!  The colors don't match up completely because they are not Stampin' Up, but they have a nice smooth effect.  I stuck with pretty basic colors here, though, so I could keep it from clashing.  Oddly enough, it's my hubby's favorite card of the three.  Probably since it's grey!!

So, tell me - which card is your favorite card?

Stamps:  Bordering on Romance
Ink:  StazOn, Memento, Riding Hood Red, Blushing Bride, Pear Pizzazz, old Olive, Island Indigo, Baja Breeze, Copic markers
Paper:  Watercolor Paper, Basic Grey, Island Indigo, Blushing Bride, Twitterpated DSP, Neenah
Accessories:  Blender Pen, Aqua Painters, Elegant Lines Embossing folder, Flower Garden embossing folder, Manhattan Flower embossing folder

Sunday, January 8, 2012

From my heart to yours treat box

First, let me give a little woot, woot!  One of my cards was featured in the Papercrafter's Library newsletter this week!  I was pretty excited about that!
So, I guess it's only appropriate to tell you that I found a template for this little treat box in the Papercrafter's Library. 
I switched all of the paper and pieces to Stampin' Up products and made my own version of their box.  It was really a small area to work with on the front, so I didn't change it up too much.   I used the new Twitterpated line from the mini catalogue for this box.  Can you tell it is my favorite new paper?  I am working on a bit of a resolution, though, which is not to hoard my pretty papers and not use them!  So, sorry...you're kind of stuck with it for a while!  
Here is a little bit of a side view.  I cut through each layer separately with the Hearts Framelits - they are only made to go through one layer at a time, so I didn't want to push it!  I just cut through one layer, adhered it to the next, lined it up again and repeated until I got all three layers done!  It's a nice way to add a window in a project like this without being limited by a punch.

Stamps:  P.S. I Love You
Ink:  Basic Grey
Paper:  Blushing Bride, Basic Grey, Riding Hood Red, Twitterpated DSP
Accessories:  Word Window Punch, Modern Label punch, Hearts framelits, Twitterpated buttons, paper flowers, Blushing Bride smooch spritz, basic pearls

Saturday, January 7, 2012

All Occasion Card set

I found this all occasion card set by Melissa Huie on UStamp this week.  She used a different color scheme, but I absolutely adored the whole set, so I decided that it would be a good set to make last night. 
Here is the card box - you can see it better in the picture above - the lid has a little lace edge that goes around it.  The box holds all of the cards inside.
The color is a little wierd on this card.  I decided to use some of the old paper from last year's mini catalogue.  I sometimes like paper so much that I won't use it!  Anyway, now I'm using plenty of it!
This card features the Kindess Matters stamp set - I just love the natural looking butterflies in this set.  I watercolored the bottom butterflies and added smooch to it.
By the way, did you know you can get this Kindness matters stamp set for FREE starting January 24?!?!?  Yes, it is a part of the FREE Sale-a-Bration products coming soon!!!  Free makes me like it even more!  ;)
This card is plain and simple - I switched to the scallop trim border punch here.
Another simple card - I like the pearls down the middle of the Always flourish here.
Do you know I've had this tulip frame embossing folder for nearly a year still in it's package?  Embarrassing, I know!  I did get it out and use it last night.  I added chocolate chip ink to the tulips to make them stand out.
This is probably my favorite card with the tulip folder.  I like the top not die sticking out from underneath and the chocolate chip scallop ribbon going across the card.

Stamps:  Always, Kindness Matters
Ink:  Chocolate Chip, Not Quite Navy, River Rock, Regal Rose, Rose Red
Paper:  Chocolate Chip, River Rock, Regal Rose, Rose Red, Very Vanilla, Springtime Vintage DSP (Retired)
Accessories:  Chocolate Chip scallop ribbon, Rose Red seam binding ribbon, linen thread, Early Espresso Baker's twine, Basic pearls, Tulip embossing folder, Smooch illuminate top coat, Top note die cut, Lace border punch, scallop trim border punch, Vintage rose (retired)

Friday, January 6, 2012

Love you - miss you - kiss you card

I threw this card together tonight out of some scraps.  My husband has been gone on a trip all week, so my daughter and I have been waiting on baited breath for him to come home!  We decided to make cards for him tonight to tell him how much we missed him!
I used the new P.S. I Love You stamp set for this card.  I colored the sentiment with Real Red and Basic Grey markers.  I punched it out with the 1" punch and the grey scrap with the postage stamp.  The heart is more Real Red and the heart punch.
My husband thinks having a pretty inside is just as important, so for him I stamped the cupid in Basic Grey and made a little trail of hearts out of a scrap of glimmer paper and the love you sentiment using the heart to heart punch.  I thought it was kind of cute!
I just hope he does, too!  :)

Stamps:  P.S. I Love You
Ink:  Real Red, Basic Grey
Paper:  Basic Grey, Real Red, Whisper White, Red Glimmer Paper, Retired DSP
Accessories:  Heart punch, Heart to Heart punch, small heart punch, 1" square punch, postage stamp punch, real red satin ribbon, basic glimmer brads

Thursday, January 5, 2012

Photo wallet and matching card

I have made a similar mini album like this before, but I loved the idea of a photo wallet with this belly band that you can just slide right off the wallet.  I thought it was too cute - and no velcro necessary! 
Almost all of the supplies for this project came from a retired Simply Scrappin' kit called Summer Home that I got off of the clearance rack a year or two ago. 
The original tutorial idea came from UStamp - Let's Score!
So, when you first open it, there are two spots for pictures - the only additional supply right here is a glimmer basic brad - the copper shaded brad in the center of the circle here.
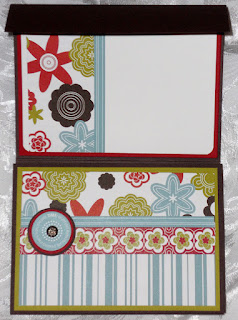
And here it is opened but not folded out.  Again, basic pieces here - a vintage trinket brad in the square sticker.  The banner is made from circles I cut in half and placed under some Cherry Cobbler Baker's Twine. 
And here is the first fold out - nice open spots for pictures to be added.
Finally, it is completely open here - I probably made this entire mini album and the matching card below in an hour and a half.  Obviously there is nothing that is earth shattering about it, but it is a great album to use as a gift or even as a quick spot for some of those pictures you've been meaning to print out for months!  (Did I say months?  Oops.....time to get some pics printed!!!)
Here's a quick little matching card - mostly just scraps here.  I added some Baja Breeze grosgrain ribbon and a basic pearl. 
I think I have just the person in mind to give this to, also!

Paper:  Chocolate Chip, Baja Breeze, Kiwi Kiss, Whisper White, Riding Hood Red, Summer Home DSP (retired)
Accessories:  Summer Home stickers (retired), basic rhinestones, basic glimmer brads, vintage trinkets, baja breeze grosgrain ribbon

Wednesday, January 4, 2012

One more page in the pregnancy journal

I had a few more ultrasounds from the last time I had an ultrasound (back in NOVEMBER!).  Anyway, I figured I'd better get them scrapped before they curled up like the other pics! 
The first pic shows us that it's a boy....how they ever see that, I'll never know!  I believe the other one is a picture of his feet.  I had a few more, but I just picked two pictures for now. 
Next week I have another appointment....maybe I'll get some more ultrasound pics - some that look closer to what our sweet baby will look like in just a few months! 

Paper:  Marina Mist, Pear Pizzazz, Nursery Nest DSP
Accessories:  Nursery Nest cardstock stickers, rub-ons & 3-d stickers (Pebbles)

Tuesday, January 3, 2012

Quilted page and card

On the UStamp class I'm taking right now, they gave a sample of a quilted page that looked similar to this.  While I used different papers from the original version, I pretty much went by the tutorial and cased the majority of the original version - I really liked the look of it!
Plus, Practical Scrappers had a challenge to try one of the new trends of 2011 and while I have tried many of those trends, this was on my list to try - a pinwheel or a quilted look. 
For this layout, I just wanted to accentuate our great food that we had on our Disney trip.  I decided to use the Cheerful Treat DSP that is in the hostess section of the big catalogue.  I love the bright and cheerful colors. 
On the title and heart, I used some retired chipboard and drug it through some VersaMark ink.  I embossed each little piece with Melon Mambo Embossing Powder.   I took a tiny swatch of the Lucky Limeade organza ribbon from the SAB catalogue and wrapped it around a few tiny sections just for accent.  Finally, I added some in color brads in the center of each pinwheel/quilt section.
And here's the other side of the page - mostly the same.  I decided to add a little doily from the Flirtatious DSP under the heart at the top.
Since I liked this technique so much, I decided to case the card, too!  More of the same paper - I just added a little Hello from the Elementary Elegance stamp set in the SAB catalogue.

Stamps:  Elementary Elegance
Ink:  Concord Crush, VersaMark
Paper:  Concord Crush, Cheerful Treat DSP, Flirtatious DSP, Lucky Limeade, Melon Mambo, Whisper White
Accessories:  In color brads, Lucky Limeade organza ribbon, chipboard (retired), Melon mambo embossing powder, scallop edge punch